Tuesday, December 1, 2009

How To PRINT SELECTED PARTS OF A WEBPAGE ?
You might have thought of saving your printer ink while printing. This becomes more prominent while printing webpages, because there are many unwanted things that comes along with the print like advertisements, images etc that simply wastes the printer's ink.How To PRINT SELECTED PARTS OF A WEBPAGE ? So, how about saving the printer ink by printing only necessary areas in a webpage ? The problem of ink wastage while printing webpages can easily be controlled to a great extend with the help of Printliminator.

In brief Printliminator is a browser bookmarklet that will help you in printing only the needed portions in a webpage.

How to Install Printliminator ?


Regarding the usage, Printliminator is very easy to use. The only thing you need to do to install Printliminator is to first go to the Printliminator Home page and drag the Printliminator bookmarklet to your browsers bookmark toolbar.
And the installation of Printliminator is complete! Thats so simple as 123.

How to Use Printliminator to Print Only Certain Part of a WebPage ?


After you have installed the Printliminator bookmarklet, you are ready to use Printliminator.

  • First, load the website on your browser that needs to be printed.


  • From the Bookmark's Toolbar in your browser click on the Printliminator bookmark.


  • You will be presented with three option's namely Remove Graphics, Print Stylize, & Send To Printer. Along with two other options.

    How To PRINT SELECTED PARTS OF A WEBPAGE ?


  • Clicking on the "Remove Graphics" option will remove all of the images in the webpage.

    Clicking the "Print Stylize" option will highlight the various elements in the webpage with in a red border. Left Clicking within the red border removes a particular section/area. You can Continue to select and remove any unwanted sections/areas until you are ready to print. If you have removed certain portion by mistake you can choose the undo option or refresh the page and start over.


Prinliminator is a great tool for saving both the printer ink and the paper.

Get the Prinliminator Bookmarklet


Labels: , ,

Sunday, November 22, 2009

Google Chrome OS Review : 7 Different things that make the New OS Unique

Finally Search Giant has released the much hyped Google Chrome OS Source Code. Developers all over the world can dive into them to come up with more programs and ideas on improving it. According to Google their new operating system is far different from any other operating system available till now. The Chrome OS team has released a short 3 minute video which briefly explains how exactly it is different from the other operating systems. Here is a brief review of the google's New Operating system.


Here are

7 different things that make the Google OS Unique


The Browser Itself is the Interface :If you have used the Google Chrome browser before, you wont feel anything new when you first take a glimpse on the new operating system this is because the browser is the primary interface of the operating system. Unlike Windows, Mac and Linux you don't have a separate desktop, file explorer etc for Chrome OS. However you can open up multiple windows some thing like multiple desktops and switch between them is some what similar to the windows 7's Alt+Tab feature with the live preview.

chrome os windows switch live preview

Designed For Security: One of the main problem's faced by the computer users today, are the viruses, spywares etc. You need an antivirus software in operating systems like windows but in chrome os you dont need such a thing because the OS is designed for security. Each and Evey application you run are put in "security sandboxes" which is designed to resist viruses and malwares. Moreover the Chrome OS is intelligent enough to verify its own code and reboots the system and fix by itself, if it finds any issues with it.
The Operating system will be always upto date. It wont give you a choice to turn on/off automatic updates. The OS automatically updates itself when required.

Google Chrome OS Demo Video


Data Storage is in the Cloud: What ever you save in your Chrome Os is synced with the clouds. the advantage is that you can have your home pc any where any time. There wont be problems like backing up data, migrating user details etc. You will have every things as such as soon as you sync up your new pc. All of your data is secure and encrypted.

Chrome OS Media Browser

Forget the Slow BootUps: This is one are where most of the operating systems lags behind. When you want to quickly work with your pc you need to wait up for at least 30 seconds or more to start working with. Google has seriously take care of this issue and its is known that the Google Chrome Os can boot up blazing fast. They are so obsessed with it that they're asking the hardware manufacturers to use specific materials just for speeding things up.

Every Thing is the Web and No App Installations: This is some thing that can make many people hate it. There wont be any software installations like in the other operating systems. There wont be any Photoshop, Microsoft Office, Adobe AIR. Instead every thing will be web apps. However there will be support for plugin/extensions support like in the Chrome Browser.

Chrome OS Application Menu

Chrome OS is Free to Use (Open Source): Like the linux operating systems chrome os will be open source. People are free to modify the code to suit their requirements and for now they can contribute the submissions back to the project.

No More Driver Supports: According to Google the new os is going to support only specific platforms. No more moving parts will be used. That means it wont run on regular PC's with physical hard drives, it needs SSDs. There will be specific requirements like screen sizes, full sized keyboards, above average touchpads etc.

According to Google the new Os is expected to ship in about a year. The Google Chrome Os will be great for Netbooks but not for the desktops.

So, What Do You Think about the New Chrome OS? Show Off Your reactions though comments.

Labels: ,

Sunday, November 8, 2009

Find The Drivers That Crashed Your System with WhoCrash

System crash is something 90% of windows users will experience in a while. There can be many reasons for it. Some may take the pain to find them correctly and fix the system while some other just ignore the problem and some just try to find it but fails.Find The Drivers That Crashed Your System with WhoCrash Most of the system crashes are due to the driver conflicts that occur in your system. It might take a lot of effort to find them correctly and fix them as for a beginner. The pain's no more here is a utility that will help you to precisely find out which driver is behind the system crash.

WhoCrashed is a powerful crash dump analysis tool that can help you in finding the drivers that have crashed the system.
Normally, debugging skills and a set of debugging tools are required to do post-mortem crash dump analysis. By using this utility you do not need any debugging skills to be able to find out what drivers are causing trouble to your computer.
This program can be the helping hand of a beginner as its very simple to use.


Just by opening WhoCrashed and clicking on the Analyze option will quickly give you the results. In most cases it can pinpoint the offending drivers which have been causing misery on your computer system in the past. It does post-mortem crashdump analysis and presents all gathered information in a comprehensible way.
Find The Drivers That Crashed Your System with WhoCrash

Who crash works with Windows 7/Vista/XP/2008/2003/2000 (x86 and x64)editions.

Download WhoCrash and Find The Drivers That Crashed Your System


Labels: ,

Monday, October 26, 2009

Download blackra1n RC2 to Jailbreak iPhone 3.1.2 Firmware

The popular iphone jailbreaking tool balckra1n has been updated to RC version by Geohot. blackra1n RC2 supports jailbreaking of iPhone (2G,3G,3GS) and also iPod touch (1G,2G,3G) which is running the 3.12 firmware. Earlier you have seen the Pwnage tool used to jailbreak the iPhone 3.12 firmware. Blackra1n is know for its quickness in jailbreaking iphone. In short its a 30 second jailbreak iPhone tool.


Download blackra1n RC2 to Jailbreak iPhone 3.1.2 Firmware

Whats new in the blackra1n RC2 release.


  • Fixed all issues that you might had when jailbreaking iPhone 3G with blackra1n RC1.

  • Tethered jailbreak for 3.1 OOTB iPod touch 8GB and all the new iPhone 3GS’s.
    Fixed Icy issues.

  • Works on both Windows and Mac.


  • Download blackra1n RC2 to jailbreak iPhone 3.12 firmware in Windows and Mac

    You can follow this guide on How to Jailbreak iPhone 2G/3G/3GS and iPod touch 1G/2G/3G running iPhone 3.1.2 Firmware with blackra1n.


    Also you can follow this to Unlock iPhone 3G/3GS 3.12 Firmware with Ultrasn0w

    Also if you need the 3.12 firmwares for iPhone download them from below.

    Download iPhone OS 3.1.2 for iPhone 2G

    Download iPhone OS 3.1.2 for iPhone 3G

    Download iPhone OS 3.1.2 for iPhone 3GS

    Labels: , ,

    Wednesday, October 21, 2009

    Transform Ubuntu To Windows 7 - Download Transformation Pack

    It's nice to see some thing vivid. Transformation packs are one such things that do this. A lot of Transformation packs are floating in the web which gives you the flavor of the operating system you want. But most of them are just for windows users. So what if the other users too want to try them. Here is a nice windows 7 transformation pack for linux that will transform ubuntu to windows 7 easily. Many users prefer linux for obvious reasons, but when it comes to beauty they cant neglect the aero glass and other effects that windows 7 has. So this windows 7 transformation pack for linux will help you to get some of the windows 7 looks to your ubuntu operating system.

    Windows 7 Transformation Pack for Linux comes with the Following.
    1) Windows 7 GDM theme
    2) Windows 7 Icons Theme
    3) Windows 7 GTK Theme
    4) Windows 7 Wallpapers
    5) Windows 7 Sounds
    6) Gnomenu Theme
    7) Windows 7 Panel Backgrounds
    8) Windows 7 Cursor theme
    9) DockBar

    Windows 7 Transformation Pack in Ubuntu Screen Shots


    Transform ubuntu (Linux) to windows 7 with Windows 7 Transformation Pack For Ubuntu

    Transform Ubuntu To Windows 7 - Download Windows 7 Transformation Pack For Ubuntu

    If you want complete step by step guide on transforming ubuntu to windows 7 then see the author's website here.

    Download Windows 7 Transformation Pack For Ubuntu


    [via Redmondpie]

    Labels: , ,

    Wednesday, October 14, 2009

    How To Copy/Backup Changed or Modified Files automatically

    Daily computer users make a lot of changes to their system. There can be mistakes that can happen such as accidentally overwriting an important file or accidentally deleting it. What ever be it we dont (most of us) usually are reluctant to make backups. This is seriously frustrating when we have a lot of files that need to be backed up, which are changed most often. So it is really a time consuming task backing up or copying the modified files, when they are in bulk. So here is a nice software than can help you out of this tedious job of backing up/copying only the changed or modified files automatically.

    How To Copy or Backup Changed or Modified Files automatically

    The copy changed files utility is a small tool that lets you to copy changed files from one directory to another.

    The program copies only the changed files, the non changed files will be left intact.

    Features of Copy Changed Files


    * Copy changed files only
    * Multi threaded
    * Append current date to destination directory for easy version maintenance
    * Set from directory
    * Set to directory
    * Set the from date, to scan for files changed after that date
    * Compare date AND time
    * Maintain directory structure in destination directory
    * Exclude files from copying, eg. thumbs.db
    * Automatically check for new version


    Screen Shot Of Copy Changed Files


    How To Copy or Backup Changed or Modified Files automatically

    The program doesn't needs to be installed, it just needs to be extracted and can be run directly.

    Download Copy Changed Files

    Labels: , ,

    Wednesday, September 23, 2009

    Copy Corrupted Files & Folders Easily with BadBlocked FileCopier

    You might have come across situations where windows refuses to copy corrupted files or folders. When ever you try to copy a damaged file, windows will give an error. Recovering these files may not be difficult as it seems.


    BadBlocked FileCopier is a freeware utility that can help you in a situation where you might want to copy corrupted files or folders.


    Unlike windows own copy utility BadBlocked FileCopier is fast and it also provides certain options for copying the files. You can select Copy Method, Block size & Priority of copy process.


    Screen Shot of BadBlocked FileCopier

    Copy Corrupted Files & Folders Easily

    Download BadBlocked FileCopier

    Labels: ,

    Sunday, September 13, 2009

    Find Invisible Users in GTalk - The Simplest Way

    Google Talk or Gtalk is among the most used instant messengers or IM's in the world. People use gtalk for many reasons. Google has added the invisible mode feature to gtalk recently and it help us to be away from distractions and we can choose the people to whom we want to talk to. This is really a useful feature, but when we need to tell some thing that is so important (assuming he might not check the emails frequently) to our friend who is online, it becomes a problem. He might be available online but will be staying invisible to us. So here is how you can check whether a user is invisible on gtalk.

    There is an easy way in gtalk itself that can be used to check whether a user is invisible.

    1. First tick the option chat off the record.
      In gmail's inbuilt chat feature, Click the down arrow at the top-right corner of the chat window and choose Go off the record.
      chat off record in gtalk

      You will see a message saying You are now off the record after that.
      I gtalk go to Settings > chat, and tick, don’t save my chat history in my gmail account.
      Note : This should be done when he/she is online.


    2. When ever you need to check whether this user is offline or invisible, just send him/her a message.

      If the user is offline (not online). Then you will receive a message in red colour saying
      did not receive your chat
      .
      But if the user is actually online (invisible) you wont receive this message in red colour, which means that the user has received your chat message.


    Now go ahead find out the users who become stay invisible in gtalk.

    Labels: , ,

    Saturday, September 12, 2009

    Download DirectX 11 For Windows Vista SP2 & Windows Server 2008 Service Pack 2 Available

    Windows 7 comes with much advanced DirectX 11. Soon the DirectX 11 graphics cards from nVidia and AMD will be out on the market. Windows Vista users wont be let down by Microsoft because they have decided to make the DirectX 11 available for Windows Vista SP2 users and Windows Server 2008 SP2. Windows Vista Users will be able to access the new DirectX 11 package through the Platform Update for Windows Vista Beta. DirectX 11 is not just a single element, it is a group of technologies packed together.

    Download DirectX 11 For Windows Vista SP2 & Windows Server 2008 Service Pack 2The Platform Update for Windows Vista Beta offers the complete new DirectX package, allowing end users and developers to take advantage of components such as DirectWrite, Direct2D, Direct3D 11, Direct3D 10 Level 9, and DXGI 1.1. In addition, the download will also deliver Windows Graphics, Imaging, and XPS Library updates to the Windows Imaging Components, XPS Print API, and the XPS Rasterization Service.
    After getting the Platform Update for Windows Vista Beta, customers can get the same DirectX technologies as of Windows 7 in Windows Vista SP2.

    Users who are running Windows Vista RTM or Vista SP1 version need to have their operating systems updated to Windows Vista SP2 inorder to get the DirectX 11 update.

    From then on Platform Update for Windows Vista's DirectX refresh will be included with the future service packs such as Windows Vista SP3 and afterwards.

    The platform update for Windows Vista SP2 users will be provided through windows update. You can see the platform update offered via Windows Update as a Recommended one.
    To get the platform update for Windows Vista SP2, Turn on you Windows Update Feature.

    If you dont have Windows Vista Sp2 Download from the following links.
    Download Windows Vista SP2 (x86) 32-bit Final

    Download Windows Vista SP2 (x64) 64-bit Final

    Download DirectX 11 for Windows 7 / Vista (SDK)

    Download DirectX for Windows 7/ Windows Vista August 2009

    Download DirectX 11 for Windows 7 / Vista (Web Installer)

    Labels: ,

    Friday, September 11, 2009

    10 Best Google Chrome Plugins You Mustn't Miss - Addons For Chrome

    10 Best Google Chrome Plugins You Mustn't Miss - Addons For Chrome Google Chrome is definitely one fast and clean Browser. Though the browser was out there  for some time, support for extensions or plugins was added recently. Plugins were the main reason why firefox turned out to be the browser of our choice. Browser addons render endless ways to enhance our online experience. Though there are not much extensions available for Google Chrome, there are some very useful plugins that could enhance your browsing experience.

    1) Google Chrome Backup Plugin


    Google Chrome Backup plugin (extension) will help you to backup your browser settings. Google Chrome backup is a small extension to create, backup, restore and manage Google Chrome profiles.
    Backup Addon for Chrome

    So in case there is a system crash or accidental deletion, you can easily restore or get back the lost settings in Google Chrome

    Download Google Chrome Backup Plugin

    2) Google Chrome AdSweep Plugin


    Adsweep extension for chrome will block ads on webpages.
    Block Ads in Google Chrome like Firefox's Adblock does, with AdSweep Plugin

    After installing and enabling the Adsweep extension it will block almost all ads in websites. AdSweep plugin for Google Chrome is in its developmental state some ads can get slipped through.

    Download Google Chrome AdSweep Extension


    3) Session Saver - Session Manager Plugin


    Usually many browse with their favorite websites opened in different tabs. It becomes nettlesome when we need to open the same websites again and again each time we open up our browser and it certainly wastes a lot of time too.
    Google Chrome Session Saver Plugin

    The Google Chrome Session Manager addon will help you to you save, manage and reload multiple sessions. Before closing the browser with your favorite tabs opened, you can save that current session with this nice plugin and the next time when you want to load all those we sites again just load the saved session with Session Manager.

    You can read more about chrome's session saver extension here.

    Download Chrome Session Saver Plugin

    4) Greasemetal Plugin for Google Chrome


    Greasemetal Extension can be said as the Firefox Greasemonkey addon for Google Chrome. Greasemonkey addon is for firefox which let you to run userscripts (user defined javascripts to modify the webpages being displayed). Greasemetal is a userscript runtime for Google Chrome. Greasemetal plugin will help to execute or run userscripts like Greasemonkey and Greasekit does for Firefox and Safari respectively.

    Download Greasemetal Plugin for Google Chrome

    5) Google Chrome Dual View Plugin


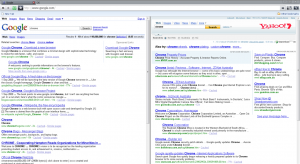
    As the name suggests the Dual View extension for google Chrome will enable you to view two different web pages in a single tab. The currents tab will split to two equal halves.

    Dual View Plugin for Chrome

    Dual View Plugin For Google Chrome

    The Dual View plugin can be put to use for comparing search results on two different search engines, compare the contents two websites side by side, Refer content in one panel, write about it in the other etc.

    Google Chrome Dual View Extension

    6) Google Page Rank / Alexa Rank Checker Plugin


    This clean and simple extension will display the current page rank of the opened website in the Google Chrome Status Bar.
    Google Page Rank Checker Extension
    With this Plugin you can easily check the credibility of websites in a jiffy.

    Google Page Rank / Alexa Rank Checker Addon for Google Chrome

    7) ChromePass Addon to View Stored Passwords in Google Chrome


    As normal human beings we do forget things. ChromePass is a sleek extension for chrome that will display the stored usernames and passwords in Google Chrome.
    View stored passwords in Chrome

    So you dont need to click the "forgot the password" link while logging into websites for which you dont remember the password.

    ChromePass Addon for Google Chrome

    8)ChromeMailer Google Chrome Plugin


    Gmail is the most used e-mail client in the world. But directly clicking on mail:to links wont open Google Mail or Gmail to send Mails. But with ChromeMailer Plugin this wont happen.
    ChromeMailer help to directly send mails using gmail by clicking the mail:to links

    You can now directly send mails using gmail by clicking the mail:to links with ChromeMailer enabled.

    ChromeMailer Google Chrome Plugin

    9)Drag n Go Plugin


    With Drag n Go Plugin you dont need to right-click and then select “Open in New Tab“ to open new links in background tab or foreground (can be customized in settings). All you need to do is to just drag the links to very small distance and drop it. You think of pressing "Ctrl + T" to open a new tab, but that too needs another hand to work to use the keyboard. With Drag n Go you dont need to do that any more.

    Drag n Go Plugin For Google Chrome


    10)Google Chrome Extension / Plugin Manager


    With all these nice extensions in chrome, there must be some thing to manage them right ?

    Extensions or Plugin  Manager For Google Chrome
    Chrome Extension Manager will help you to easily browse through the installed extensions on Google Chrome and enable, disable or delete the extensions from the application itself.

    Google Chrome Extension/Plugin Manager

    Don't forget to comment your opinions below.


    Related : 20 Keyboard Shortcut's to Enhance Your Web Browsing Speed

    Labels: ,

    Monday, September 7, 2009

    Get Tab Feature in Microsoft Office with OfficeTab

    Tabbed browsing is one such good feature that made the web browsing so easy. It saves us a lot of time in toggling between webpages. As a result tabbed browsing has become a part of every browser now. So, how about getting this Tab feature in Microsoft Office. Usually while you are working with two different documents, you need to click on the windows taskbar to switch between them. This becomes a pain when you have a lot of work to do. Hence a Tab browsing feature in Microsoft Office can really improve the productivity and save us a lot of time.

    Get Tab Feature in Microsoft Office with OfficeTab
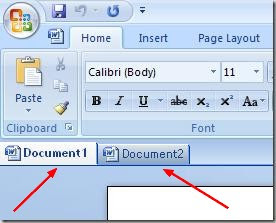
    OfficeTab is a small addon to Get the Tab feature support for Microsoft Office programs. OfficeTab will add the tab feature in Microsoft Word, Excel and Powerpoint.


    Switching between documents will be a cake-walk with OfficeTab Addon. With OfficeTab addon there wont arise a problem of opening a new window in-order to open another document.

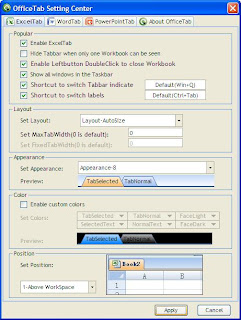
    After installing OfficeTab the OfficeTab Setting Center will be launched. Make sure that the Tab feature is enabled for Word, Excel and PowerPoint from there.

    Get Tab Feature in Microsoft Office with OfficeTab

    You will also have various options for customizing the tabs such as set the width of the tab, set the Tab's color, Set Shortcut keys to switch between tabs etc.


    Download OfficeTab Addon for Microsoft Office

    Labels: , ,

    Saturday, September 5, 2009

    How To Upgrade Windows XP to Windows 7 Completely & Perfectly

    How To Upgrade Windows XP to Windows 7 Completely including all your installed programs settings and every thing PerfectlyThere are some guides on the internet telling you how to Upgrade from Windows XP to Windows 7. All these guides tell you how to upgrade from Windows XP to Windows 7, but there is a limitation that you can't transfer the installed programs in windows xp to windows 7 and also some other settings too. Windows users might have been disappointed when it was known that there is no direct upgrade option available from Windows XP to Windows 7.

    The users need to format the current Windows XP partition and install Windows 7 over it losing all settings and files in Windows XP or the users can install windows 7 on a different partition and dual boot Windows Xp and Windows 7.
    There was one correct way to transfer all settings, files, installed applications, program data, documents etc. to windows 7 from windows xp, it was done by first upgrading windows xp to windows vista and then upgrading windows vista to windows 7. But it's a time eating process.
    So other guides came up telling you to transfer windows xp to windows 7 using the migration wizard application in windows 7 DVD. Using migration wizard application users can transfer account settings, documents etc to windows 7 from windows xp but the program settings and installed programs wont work in windows 7 as the registry settings were not transferred. You need to manually reinstall all your programs installed in windows xp to Windows 7.

    Windows users need not to worry as Laplink Software comes to compensate the shortcomings of Windows 7 in-place upgrades with PCmover. PCmover is capable of allowing end users to perform special "in-place" upgrades from XP to Windows 7.
    According to Lap Link software,
    PCmover is the ONLY migration utility that moves programs, files, and settings from your old PC to your new PC. Simply install PCmover on both your old and new computers and go! PCmover will determine which programs, files, and settings need to be moved, and when the transfer is complete, your new computer will have the personality and functionality of your old PC as well as all of its own pre-installed software. Works with almost any Windows operating system.
    How To Upgrade Windows XP to Windows 7 Completely including all your installed programs settings and every thing Perfectly with PC Mover
    How to Use PC Mover to Upgrade From Windows XP to Windows 7

    • Install PCmover on the Windows XP computer to be upgraded.

    • Run PCmover and select the upgrade option.

    • Install Windows 7, selecting the “do not reformat” option.

    • Install and run PCmover which will automatically restore all applications, files, and
      settings.


    Pc mover can move your Installed applications and their associated settings/registry entries, including any custom software, Microsoft Office, Design Programs, PC Games, Instant Messengers, Financial and Tax Software, Spreadsheets, Photos, Videos, Music, Podcasts, Desktop Backgrounds, Icons, Browser Settings, Favorites/Bookmarks, Internet & Network Settings from Windows XP or Windows Vista to Windows 7 easily. If your computer has multiple users, PCmover gives you the option to migrate some or all of the users at once. PC mover not only works for windows Xp, but also is designed to automatically migrate older Windows releases to Windows 7.

    If you have 32-bit Vista and wish to upgrade to 64-bit Windows 7 in order to address more than four gigabytes of memory, that upgrade is not supported by Microsoft. PCmover properly handles all issues related to 32-bit and 64-bit upgrades and migrations.
    However, this magical software is not a freeware. If your old settings and files are so important to you then you can buy PC mover.
    Home users will be able to buy PCmover Home, with a price tag of under $40, but Laplink is also offering volume licenses to business customers, withPCmover Enterprise available for less than $10 per migration.
    This is not a sponsored review just for your information

    Labels: ,

    Post to Twitter through Desktop Application / Update Twitter Status From Desktop

    There are many twitter desktop applications available on the net that will help to post to twitter directly from your desktop. Usually we post to twitter / Update twitter status from the Twitter website. It is very easy to post to twitter when we are browsing. But when no browsers are opened up and we need to update our twitter status quickly, then it becomes a pain. So here is a desktop application for twitter that will help you to post to twitter/ update your twitter status right from your desktop.

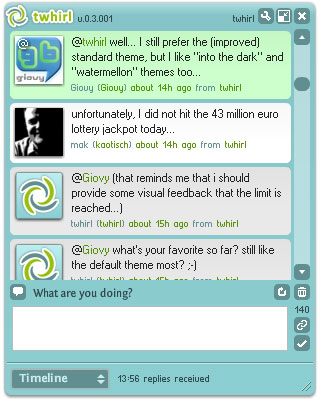
    Almost all the twitter clients for desktop have similar features. Twhirl is one of the best twitter client around.
    Twhirl stands out from most of the twitter clients for desktop, because it supports both Windows and Mac OS X operating systems. So almost all internet users can use Twhirl. This is because Twhirl uses the Adobe AIR platform.
    With this wonderful twitter client, desktop tweeting will be very easy and you need not open any web browser to update your twitter status or for posting your updates to twitter.

    Some of the Features of Twhirl - Twitter Desktop Application


    • Twhirl can connect you with multiple Twitter accounts and also supports laconi.ca, Friendfeed and Seesmic accounts.

    • You dont need to bother any more shortening big urls for twitter. Twhirl can Shorten long URLs (using digg.com, bit.ly, snurl, twurl or is.gd)

    • You will be notified when new messages arrive.

    • You can also post to various other socail networking sites aprt from twitter, like Jaiku, Facebook, MySpace, LinkedIn and more via Ping.fm

    • Post images to TwitPic

    • Search tweets using Twitter Search and TweetScan, and follow topics in near-real time with saved searches

    • automatically find tweets mentioning your @username


    Screen Shot of Twhirl - Twitter Desktop Application
    Post to Twitter through Desktop Application / Update Twitter Status From Desktop
    There are many other features too.
    When you hover the mouse cursor over your twitter friends avatar, options will be displayed like Retweet, direct messages, favorite , replies.

    Download Twhirl

    Labels: , , , ,

    Friday, September 4, 2009

    How to Run Memory Intensive Applications Smoothly on Your PC

    Most people today, run multiple applications at the same time to speed up their work and time. But it becomes a head ache when many of such programs eat up the system memory and make the system slow. This really matters if you are running photoshop and other memory intensive applications on a PC at the same time with less amount of ram. Either the system gets extremely slow or hangs. When this happens our time and energy just gets wasted instead. Programs like Firefox, Photoshop, Adobe Premiere consumes and wastes a lot of memory / ram. If the wastage of ram by these applications can be controlled then the above mentioned system hangs and related problems can be solved to certain extend. So ,here is an application to optimize or reduce the memory usage and wastage of any application to a great extend.

    Minimem is an application developed to reduce the memory foot print of any application. Minimem will run in the background with out interfering your work and Minimem can be set to optimize the memory usage of any number of applications as you wish.

    What makes Mimimem special is that it will give full control over what applications you want to optimize, when and how often, as well as the possibility to only optimize memory when required. Mimimem optimizes the memory usage of applications by removing as many non-necessary memory pages as possible from the selected processes.

    Advantages of using Minimem to Reduce Memory Usage of Applications
  • Reducing the memory footprint of memory-heavy applications that should not e.g. web browsers or office applications

  • Making it easier to run applications with memory leaks, e.g. Firefox 2 or extremely large footprints e.g. Firefox 3

  • Running multiple applications on the same computer e.g. web desktop tool, web browser, office application all concurrently

  • Use computers that are not so recent with modern application

  • ScreenShot of Minimem's User Interface
    How to Run Memory Intensive Applications Smoothly on Your PC

    Memory Usage of Opera without Minimem
    How to Run Memory Intensive Applications Smoothly on Your PC

    Memory Usage of Opera Optimized with Minimem
    How to Run Memory Intensive Applications Smoothly on Your PC

    Applications that are best to be optimized for memory are typically office applications, word processors, and web browsers. Minimem was originally developed for Mozilla Firefox and hence it works the best with it.
    After running Minimem it will remain in the system tray without interfering your work there by helping you access its settings at any time. Minimem has a simple user interface that is flexible for any type of user. Minimem requires .NET framework 2.0 installed. Above all Minimem is a Freeware and works with Windows 98, 2000, XP, Vista and Windows 7.

    Download Minimem

    Labels: ,

    Tuesday, September 1, 2009

    How To Wake And Shutdown Your PC At Specified Time Intervals (Automatically)

    There are many software's available for the purpose of shutting down your PC at a specified time. Today i was looking for a tool that could wake your pc at a specific time and shutdown. I usually start the downloads at 2:00 am in the morning and ends it at 8:00 am since at these time i downloads are free for my internet connection. So waking up at 2:00 am just for this purpose is a tough thing as it disturbs my sleep. So i was looking for a way to make wake my pc at 2:00am and shutdown it at 8:00am i found DShutdown.

    DShutdown is an excellent tool that will help you to shutdown your pc at a specified time as well as wake it. DShutdown can also be used for waking and shutting down remote PCs at specified time, with a variety of options.
    DShutdown is not just an ordinary wake up and shutdown tool it has a plethora of features.
    DShutdown supports more than just standard shutdown options, there are options relating to "pure" shutdown (such as the "force after wait" option which causes a forced, but 'clear' shutdown).

    How To Wake And Shutdown Your PC At Specified Time Intervals (Automatically)
    DShutdown includes options to shutdown your PC when a particular application gets closed, intercept a shutdown request, initiated by the user or an application, and to then execute the shutdown request with selected options from DShutdown (This is very helpful to shutdown all the connected PC's in LAN when the server shutsdown).

    There are also options to shutdown a PC when the Internet traffic reduces below a particular data-rate (useful to shutdown a PC when it has finished a large download).

    How To Wake And Shutdown Your PC At Specified Time Intervals (Automatically)
    There is a RDShutdown tool included with the package which will help you to shutdown remote PC's very easily. The RDShutdown tool should be installed in the Remote System.

    DShutdown doesn’t force a power-off without logging off and saving settings.
    DShutdown doesn't needs to be installed in your computer, it is portable and you can carry on a flash drive and run it directly on any PC and its Free. DShutdown works with Windows 9x/NT/2000/XP/2003 and Windows Vista systems.

    Download DShutdown

    Labels: , ,

    Thursday, August 20, 2009

    Download Google Chrome Session Saver (Restore) Addon/Extension

    One of the vital features that makes a browser complete is the session saver or session restore feature. Opera and Mozilla Firefox have those features embedded in them. We realize the importance of such a feature when we close our browsers with a lot of tabs opened. So when we start the browser next time we dont require to open those websites again if the browser has the session saver or session restore feature. The first thing that made me love Opera browser was the session saver (session restore) feature of it. The most buzzed Google Chrome browser came out with blazing speed, clean looks etc. and have managed to impress many internet users. But why i dont use Chrome much is because of the lack of the session save feature in Chrome. But from now on its not because the the Session Saver (Restore) Addon has been released for Google Chrome.

    I dont know why Google didn't embed this very useful session saver/restore feature in Chrome. But any way you can now enjoy the wonderful session saver feature or extension with by installing the session saver Addon in Google Chrome which was meant to opera and firefox earlier.
    The Session Saver (Restore) Addon for Google Chrome can save, restore and manage multiple sessions.

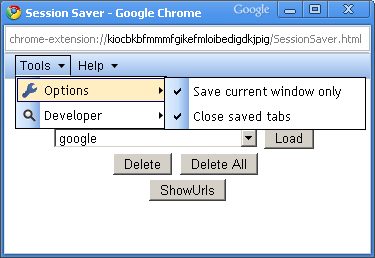
    Screen Shots of Session Saver (Restore) Addon/Extension for Google Chrome


     Download Google Chrome Session Saver (Restore) extension/addon /Addon
    Session Saver Addon For Google Chrome

    Features of Session Saver (Restore) Addon/Extension for Google Chrome


    •  Saves all tab urls for all chrome windows.
    • Saves multiple sessions with custom names.
    • Loads all urls from saved session to current window in new tabs.
    • Can view all urls to copy/paste from.
    • Can save tabs just for current window.
    • Can close saved tabs.


    After you have installed the Session Saver extension in Google Chrome a save icon will be visible in the status bar.
    On clicking the save icon you will see a popup window to give a name and save the current session to disk. When you need to restore any particular session saved before click on the save icon and select the session you want to restore from the list followed by clicking the load button.
    You can now restore the last browsing session in Google Chrome.

    Download Session Saver Addon/Extension For Google Chrome

    Labels: ,

    Sunday, August 16, 2009

    How To Create Videos From Images/Photos For Free

    Wont it be nice to convert our favorite photos into videos? Images / Photos taken using digital Cameras can be well presented by converting them into beautiful videos. Instead of sporadically saving photos in your PC, it adds more value if you could make those photos into wonderful slideshows for free. It would be better if you can combine all the images taken at some important occasion into beautiful looking slideshows.How To Create Videos From Images For Free
    Here comes PhotoFilmStrip that will answer your question on how to create videos from images. The task of creating slideshows from images is not a tedious job at all if you have the right tools with you. The task will be completed in a matter of minutes! with PhotoFilmStrip.
    PhotoFilmStrip will create beutiful slideshows from images in just three steps.

    How To Create Videos (Slideshows)from images with PhotoFilmStrip


  • First Select the photos/ images from which the video or slideshow is to be created.

  • Customize the motion path

  • Render the video

  • PhotoFilmStrip supports Popular Video output formats such as VCD, SVCD, DVD up to FULL-HD.

    PhotoFilmStrip Screen Shot- Create Videos from Images


    Create Videos From Images Free

    Download PhotoFilmStrip

    Labels: , ,

    Tuesday, August 11, 2009

    70 Useful Windows Commands Into One Application - Must Have Windows Tool

    You might have experienced many difficulties like " Not able to Kill Running Application", "Can't close a Non Responding Application" etc. while working with windows. There are many such similar problems like that. Newbies will find it hard to solve these problem (not just the above two alone). It wont be easy for them to quickly solve these windows problems. So, here is a tool that has a collection of 70 useful commands which is embedded into one application for instant use. This tool will be a boon for the non-technical users.

    Commands in Demand is a free handy tool for Windows 7, Vista and XP that has more than 70 commands that may be needed instantly for a purpose while working with Windows.
    Commands in Demand comes with many easy shortcuts to terminate non-responsive applications, open a command prompt in a selected folder, restart Windows Explorer, view TCP/IP configuration settings, view/clear the clipboard, access system folders etc.
    To make things easier Commands in Demand has categorized the commands according to were its commands are related. The commads are categorized as Application errors, Application visible window, Clipboard, Desktop, Devices, Files and Folders, Graphics, Icons, Internet, Memory and CPU, Network, System, SysTray, Taskbar, and Windows applications.

    70 Useful Windows Commands Into One Application - Must Have Tool For Non Geeks

    How to Use Commands in Demand


    This tool is ver easy to use. Just install the application, run it, select the required category to execute the needed commands.

    Some of the Commands Available with Commands in Demand:

    » Applications' Shortcuts creator to minimize applications in the System Tray.
    » Clipboard real-time Editing
    » Color Sample Picker
    » Command Prompt starter in any folder of the System
    » Desktop Icons Refreshing
    » Desktop Shortcuts Copy to a desirable folder
    » Device Manager with Hidden Devices
    » Hide / Show Desktop Icons
    » Icons Extraction from files
    » Image Convention of known formats
    » Internet Searching with Two Engines simultaneously
    » List Alphabetizer Application
    » Memory and CPU Info
    » Memory Instantly Cleaning
    » Non-Responding Applications Killing
    » Running Processes Killing
    » Safely Removal of USB Drives
    » Screenshots of whatever is visible
    » System Drives Quick Cleaning
    » System instant General Refresh
    » System's Clock Hiding
    » System's Volume Mute
    » Taskbar Hiding
    » Transparency Level to the Active window
    » Transparency Level to the Taskbar
    » URL Shortcuts creation
    » User's and Common System Folders browsing
    » Windows commonly used and hidden applications starter
    » WinLogoKey shortcuts simulator and more....
    These commands are very useful for all the windows users. Hope You will love it.

    Download Commands in Demand


    Labels: ,

    Tuesday, August 4, 2009

    Backup/Restore Firefox, Chrome, Opera, Safari & Internet Explorer with a Single Tool

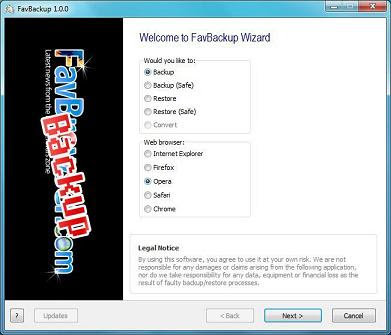
    It was a tough time for me in the past when i really spend a lot of time for taking a backup of my favorite browsers, Firefox, Opera, Chrome and Safari. Everybody customizes their browser's to suit their needs. So it is important to backup their browser for preserving those customizations. I used to crawl into the Application Data folder and copy those needed files to another location. Thats how i used to take the backup of Firefox, Chrome, Opera, Safari. When i format my pc and reinstall windows i copy them back after installing them. Thats how i preserved my bookmarks, browser history, extensions, visited links, preferences and plugin data. But now i backup all of my favorite browsers in a snap! with the help of FavBackup.

    Backup Firefox, Chrome, Opera, Safari & Internet Explorer with a Single ToolFavBackup is such an awesome tool to backup Firefox, Chrome, Opera, Safari & Internet Explorer in a Single Shot. FavBackup boasts a sleek and simple interface. It is sure to impress even the first time users.
    FavBackup needn't to be installed in your PC. It is a stand alone application and can be used without installing. You only need to run the small executable file of FavBackup.
    FavBackup currently supports Internet Explorer (6-8), Firefox (2-3.5), Opera 9, Safari (3-4) and Google Chrome (1-3).

    How to backup Firefox, Chrome, Opera, Safari & Internet Explorer Browser Settings with FavBackup ?


    The process is very simple. After running FavBackup just choose Backup / Restore from the options displayed and followed by selecting the browser you need to back up / restore.

    Backup Firefox, Chrome, Opera, Safari & Internet Explorer with a Single tool

    When a backup / restore has been completed successfully FavBackup displays a green check mark beside each of the items

    FavBackup is compatible with Windows 2000/XP/Vista/7. FavBackup is a Freeware and is a must have Browser Backup Tool for the daily internet user.

    Download FavBackup

    Labels: , ,

    Friday, July 31, 2009

    Enlarge Images Without Losing Quality/Pixelated – 4 Must See Tools

    When we Enlarge images chances are very less that we might get a perfectly enlarged image without any loss of quality. Either the image will be blurred, pixelated or noisy. This is a common problem faced by most of the people while enlarging images. Recently,  I came  across a few softwares and online services that will help to Enlarge pictures without losing any quality/getting pixelated/blurred.


    Enlarge Images without losing quality or getting pixelated and blurred

    1) SmillaEnlarger


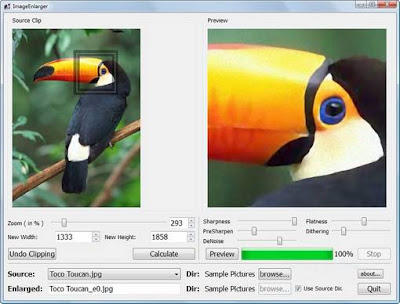
    This small Image Enlarger will help you to enlarge images photos without losing quality or getting pixelated. SmillaEnlarger can also convert a low resolution images to a high resolution images by minimizing the images distortion and by maintaining as much as details as possible. SmillaEnlarger comes with many image adjustment options and a instant preview window to see the real-time preview of the enlarged images. This utility certainly gives dramatically good results.
    SmillaEnlarger - Enlarge Images Without Loosing Quality
    But there is some  thing that i found annoying with this tool. The Lack of a Save Option!. We need to first select the directory containing the images. The program will save the images automatically with a new name. In short this Image Enlarger is a nice application that will help us to easily enlarge the images without making it lose its quality or getting blurred / pixelated.

    Download SmillaEnlarger


    2) VectorMagic


    You may know that vector images are made of lines and curves which also have their respective position and colors used, stored in the images. So what make vector images special is that they can be resized into any size. You can decrease the image size or enlarge it to any size without losing any of its qualities. So, if we can convert the BMP and JPEG (bitmap) images into vector images. Enlarging images without losing quality will not be a problem at all. Thanks to Ray from Raymond since i came to know about vector magic from there.

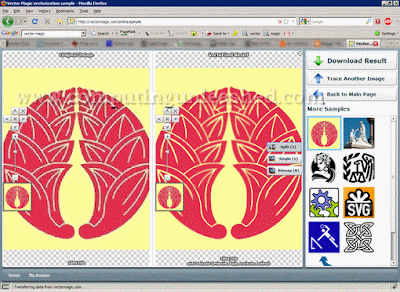
    Vector Magic is actually a website that will help you to enlarge images online. Vector Magic website provides a free online service to convert bitmap images to vector images easily. It makes this possible using its auto-tracer service.
    VectorMagic - Enlarge Images Without Loosing Quality

    How to Use Vector Magic to Enlarge images


    (You need to have adobe flash player installed in your system for this to work)


    1. Browse the Bitmap image to be converted into vector format and click on Upload.

    2. Now Select the quality level of the image and select if the image less than 12 colors or more than that.

    3. Choose the palette needed to convert your image into vector format.

    4. This is it. The final vector image can be downloaded in PNG, SVG or EPS formats.

    You can now enlarge the image to any amount of size as needed without losing any quality or getting pixelated/blurred. Vector Magic produces excellent results and moreover it is free and its the best way to enlarge images free.

    Visit Vector Magic to Enlarge Images


    3) SizeFixer - Enlarge images up to 400%


    SizeFixer is a wonderful tool from FixerLabs. Before starting with let me say SizeFixer is not a Free Tool so i didn’t wanted to include this in here, but later i thought of its usefulness to professionals so i included SizeFixer. What makes this tool special is its capability to enlarge images upto 400% of its original size. Thats way ahead of other softwares can do. SizeFixer makes this possible by automatically erasing the dark and faded parts in the image thus giving rise to a high clarity image without losing quality. SizeFixer was first released in 2005 for MAC. Later the windows version came up promising to enlarge images by 33×46 inches without losing any of its quality.
    SizeFixer - Enlarge Images Without Loosing Quality
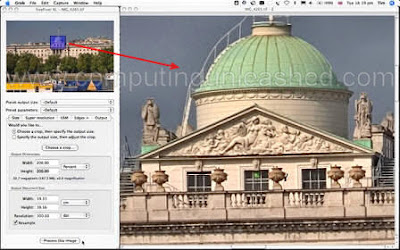
    The "super-resolution technology" of SizeFixer contributes to the making of such gigantic images. SizeFixer comes in 3 different versions - XL, SLR & Home. SizeFixer Home version can Enlarge images upto a size of 16 Mega Pixels. SizeFixer is a pricier tool but it is worth for professionals. SizeFixer XL, SLR & Home costs $199.95, $269.90 & $59.95 respectively. SizeFixer is not just an ordinary tool because it is used by the government authorities, military and also in NASA. If you want to experience what SizeFixer is actually capable of then i suggest you to go for a free trial first.

    Download Size Fixer


    4) Reshade - Photo Enlargement Without Quality Loss


    Reshade eliminates most of the problems faced during photo enlargement process such as pixelation, loss of focus, loss of sharpness, exagerated noise . Reshade also comes with an online service to resize the images. You can make the image smaller or enlarge it. The Desktop Version of Reshade is not free and it costs 149$ to buy and there is a premium online service too which offers similar features of the desktop application.


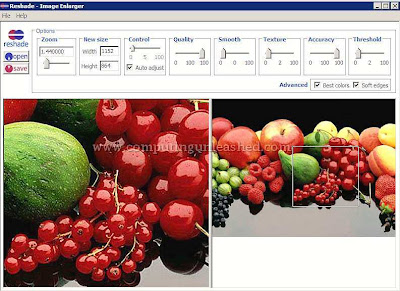
    I am dealing with the free online service of reshade since it is free and does a decent job. It is adequate for home use. Professionals may require the paid version. You can use the Reshade service with or without an account but the features will vary. It is free to create  free account with reshade and it provides some more features. Signing up for a free Reshade account offers you the ability to enlarge images to a maximum resolution of 1920x1200px with a zoom of 2X.

    Reshade - Enlarge Images Without Loosing Quality
    You will be able to enlarge images to standard monitor resolutions, enhance poor quality images, crop. It supports JPG, BMP, GIF, PNG image formats,  single frames and non-transparent, maximum file size is 10MB, maximum size is 4000x4000 pixels, minimum size is 50x50 pixels. You can either upload the image from your system or from direct link and then you can select the specifications and the enlarged image without much loss of quality will be ready for download with in a few seconds!

    Visit Reshade Free Image Enlarger


    if there are other image enlarging software's, comment it down Friends.

    Labels: , ,